When most people think of a quick pantry meal, their minds drift toward bland, uninspired choices. However, this canned tuna pasta is here to shatter those expectations, transforming humble staples into a vibrant, Mediterranean-inspired masterpiece that rivals any seaside bistro.
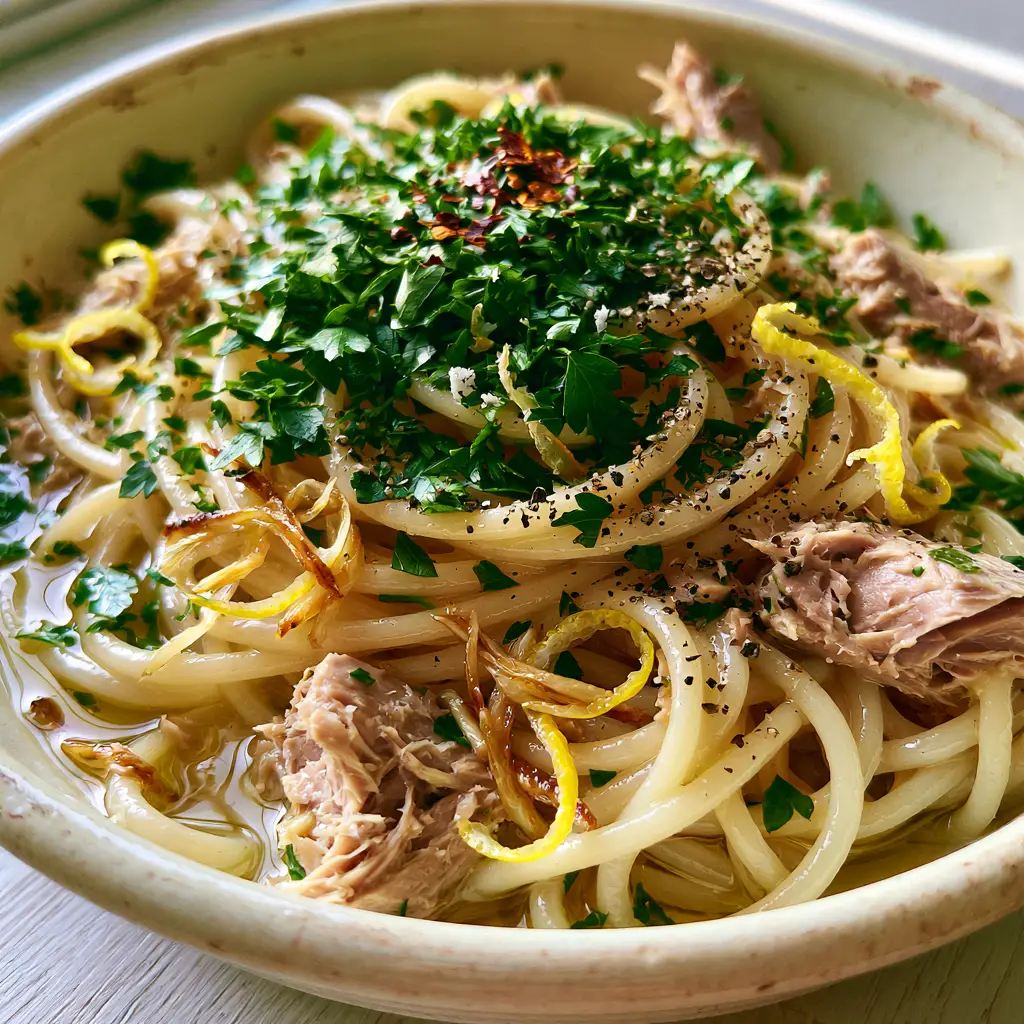
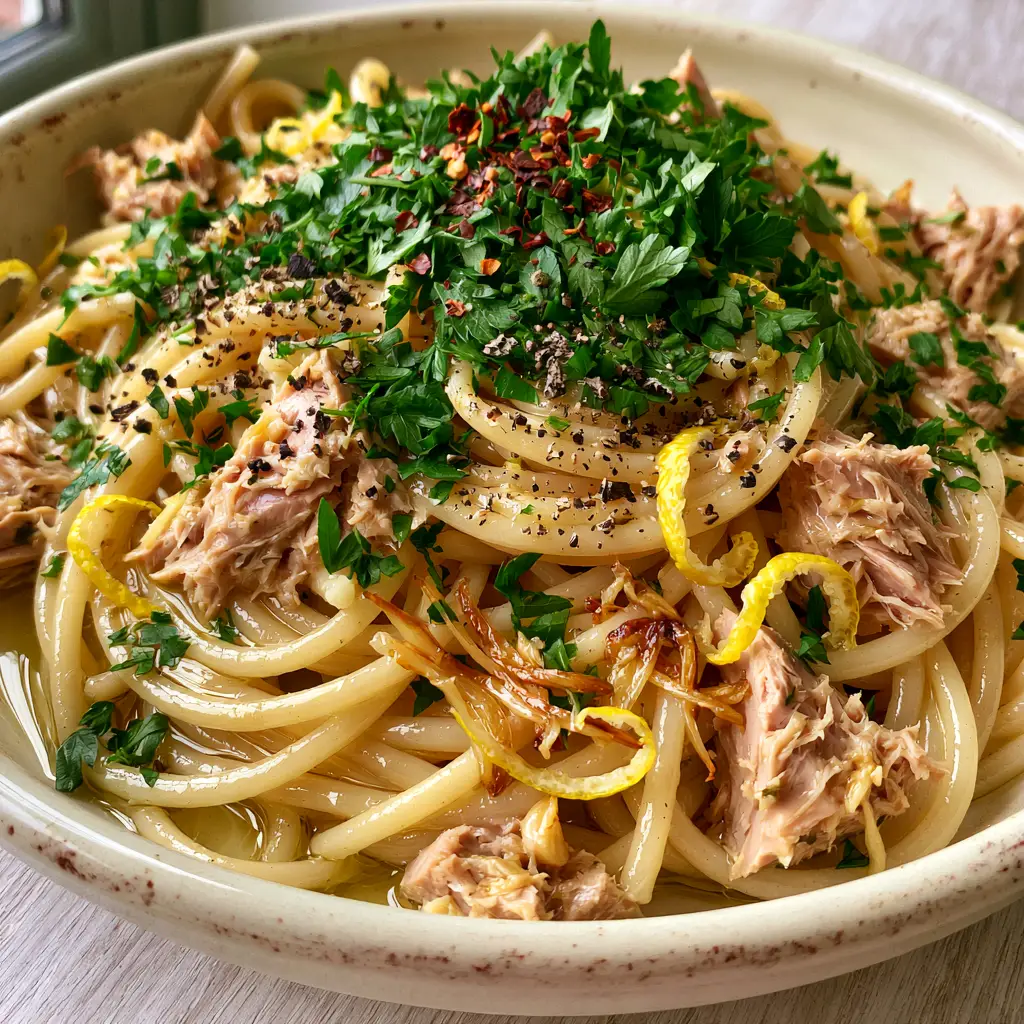
Imagine al dente spaghetti strands perfectly coated in a translucent, shimmering sauce of extra virgin olive oil and infused with the warmth of golden-brown garlic slivers. The contrast between the moist, flaky tuna chunks and the bright, zesty curls of lemon creates a sensory experience that is both comforting and sophisticated.
This dish is a testament to the power of high-quality ingredients and proper technique. By focusing on the emulsion of pasta water and oil, we create a handheld smartphone-worthy aesthetic—glossy, rustic, and undeniably appetizing—right in your own kitchen.
Why This Mediterranean Tuna Spaghetti is a Game-Changer
- Textural Contrast: We pair firm, al dente spaghetti with tender, moist flakes of tuna and the subtle crunch of sautéed garlic slivers.
- Flavor Harmony: The richness of the olive oil is perfectly balanced by the sharp acidity of fresh lemon zest and the gentle heat of red chili flakes.
- Speed and Simplicity: This entire canned tuna pasta comes together in the time it takes to boil your water, making it the ultimate weeknight luxury.
- Visual Brilliance: With pops of bright green parsley and golden garlic, this dish is designed to look as good as it tastes.
The Essential Pantry Elements for This Coastal Pasta Dish
Spaghetti (340g / 12 oz): The long, thin profile of spaghetti provides the perfect surface area for the glossy lemon-garlic sauce to cling to. Always cook it one minute less than the package directions to ensure it finishes to a perfect “to the tooth” bite in the pan.
Canned Tuna (2 x 142g / 5 oz cans): Seek out high-quality tuna packed in olive oil for the moistest, flakiest results. Unlike water-packed tuna, oil-packed varieties retain their structural integrity and add a deeper layer of savory flavor to the final dish.
Extra Virgin Olive Oil (80ml / 1/3 cup): This is the foundation of your sauce, so use a high-quality oil with fruity or peppery notes. It creates the glossy, translucent coating that makes the pasta glisten under natural side-lighting.
Fresh Garlic (4-6 large cloves): Instead of mincing, we slice the garlic into thin slivers to achieve those beautiful golden-brown chips. This technique provides a mellow, nutty sweetness rather than a sharp, pungent bite.
Lemon (1 large): You will need both the juice for acidity and the zest curls for that bright yellow visual pop. The oils in the zest are essential for that signature citrus aroma that cuts through the richness of the fish.
Fresh Flat-Leaf Parsley (15g / 1/2 cup, finely chopped): This herb adds more than just color; it provides a clean, peppery finish that ties the garlic and tuna together. Be sure to use flat-leaf (Italian) parsley for the best texture and flavor profile.
Red Chili Flakes (1/2 tsp): A subtle pinch provides a back-of-the-throat warmth without making the dish overly spicy. It acts as a flavor enhancer that makes the other ingredients sing.
Coarse Cracked Black Pepper and Sea Salt: Freshly cracked pepper provides a bold, floral heat that pre-ground pepper simply cannot match. Salt is critical, especially in the pasta water, to season the noodles from the inside out.
The Essential Tools for a Flawless Pasta Aglio e Olio with Tuna
To achieve the restaurant-quality emulsion required for this canned tuna pasta, a large stainless steel skillet or wide sauté pan is vital. The wide surface area allows the pasta and sauce to toss freely, ensuring every strand is coated in that glossy liquid gold.
You will also need a sharp chef’s knife or a mandoline to create the uniform garlic slivers and a microplane for those delicate lemon curls. A pair of kitchen tongs is the best tool for swirling the spaghetti into a rustic, high-volume nest inside your ceramic bowls.
How to Achieve the Perfect Glossy Emulsion: A Step-by-Step Guide
1. Mastering the Al Dente Foundation
Bring a large pot of heavily salted water (it should taste like the sea) to a rolling boil. Add 12 oz (340g) of spaghetti and cook, stirring occasionally to prevent sticking.
Crucially, remove the pasta when it is still slightly firm—about 1-2 minutes before the package “al dente” time. Before draining, reserve at least 1 cup (240ml) of the starchy pasta water; this “liquid gold” is the secret to a smooth, non-greasy sauce.
2. Sautéing the Golden Garlic Slivers
While the pasta boils, add your 1/3 cup (80ml) of extra virgin olive oil to a cold skillet and add the garlic slivers. Set the heat to medium-low, allowing the garlic to gently infuse the oil as it heats up.
Watch for the sensory cue: the garlic should begin to sizzle softly and turn a pale, golden-brown. Immediately add the red chili flakes and a generous amount of coarse cracked black pepper to toast for 30 seconds until fragrant.
3. Incorporating the Flaky Tuna
Drain your canned tuna (if using oil-packed, you can keep a little of the oil for extra flavor) and add the moist chunks into the skillet. Use a wooden spoon to gently break the tuna into large, distinct flakes rather than a paste.
Add the lemon zest curls and a splash of the lemon juice. The heat should be low at this point to prevent the tuna from becoming dry or rubbery.
4. The Glossy Finish (The Emulsion)
Transfer the slightly undercooked spaghetti directly into the skillet with the tuna and garlic. Pour in about 1/2 cup (120ml) of the reserved pasta water and increase the heat to medium-high.
Toss vigorously with tongs for 1-2 minutes. You will see the starchy water and olive oil transform into a glossy, translucent sauce that clings to the noodles. If the pan looks dry, add more pasta water a tablespoon at a time.
5. The Final Flourish
Remove the pan from the heat and fold in the finely chopped fresh flat-leaf parsley. This preserves the bright green color and fresh flavor. Give it one final toss and taste for seasoning, adding more sea salt or lemon juice if needed.
Secret Techniques for Restaurant-Quality Canned Tuna Pasta
- Don’t Over-Flake: Keep the tuna in “moist flaky chunks” as seen in the visuals. Over-stirring will turn the fish into mush, ruining the rustic texture of the dish.
- Temperature Control: Never burn your garlic. If the slivers turn dark brown or black, they will become bitter. Start with a cold pan to ensure even browning.
- The “Starch” Secret: The pasta water is what prevents the oil from just sitting at the bottom of the bowl. It creates a creamy, unified sauce without the need for heavy cream.
- Finishing with Cold Oil: For an extra-glossy sheen, drizzle a tiny bit of fresh, cold olive oil over the plated pasta right before serving.
Maintaining Freshness: How to Handle Leftover Seafood Pasta
While this canned tuna pasta is best served immediately to maintain the “glisten” of the oil-slicked pasta, leftovers can be stored in an airtight container in the refrigerator for up to 2 days.
To reheat, avoid the microwave, which can make the tuna taste “fishy” and tough. Instead, place the pasta in a skillet over low heat with a splash of water or a drizzle of garlic lemon pasta sauce to loosen the emulsion and restore the glossy texture.
Complementary Dishes for Your Canned Tuna Pasta Feast
To turn this into a full Mediterranean spread, consider pairing the pasta with a crisp, acidic side dish. A cucumber salad or a light tomato zucchini pasta side would complement the lemon notes beautifully.
If you find yourself craving different seafood profiles, you might also enjoy experimenting with canned salmon recipes or even elevating your weekend dinner with seared tuna steaks. For those who love the spice profile of this dish, a spicy tuna bowl offers a wonderful rice-based alternative.
Mastering the Art of Pantry Pasta: Your Questions Answered
While spaghetti is classic, long noodles like linguine or fettuccine work best. If using short shapes like penne, ensure you toss extra vigorously to get the sauce into the ridges.
No, canned tuna is already cooked. You only want to gently warm it through in the infused oil to maintain those large, moist chunks and prevent it from becoming tough.
The secret is reserving starchy pasta water. When tossed with the olive oil and pasta, it creates a glossy emulsion that coats every strand, keeping the dish moist without needing extra oil.
For the best texture and moisture, use tuna packed in olive oil. It yields large, moist flakes that integrate perfectly into the sauce, whereas water-packed tuna can become dry and grainy when heated.
Starting garlic in cold olive oil allows the flavor to infuse gradually as the oil heats up. This ensures the garlic slivers turn golden-brown and sweet rather than burning and becoming bitter.
The Definitive Recipe for Glossy, Lemon-Garlic Canned Tuna Pasta
Canned Tuna Pasta with Lemon, Garlic, and Glossy Olive Oil
Ingredients
Equipment
Method
- Bring a large pot of salted water to boil. Cook spaghetti until just under al dente. Reserve 1 cup (240ml) of pasta water before draining.
- Add olive oil and garlic slivers to a cold skillet. Heat over medium-low until garlic is golden-brown. Add chili flakes and black pepper.
- Gently fold in moist tuna chunks and lemon zest. Keep chunks large and flaky.
- Add pasta and 1/2 cup pasta water to skillet. Toss vigorously over medium-high heat until a glossy, translucent sauce coats the noodles.
- Remove from heat. Fold in chopped parsley and lemon juice. Serve in warm bowls.
Notes
Reserve more pasta water than you think you need to adjust the sauce consistency.
Join the Honest Food Craving Community
This canned tuna pasta is proof that you don’t need a massive grocery budget to create a visually stunning and delicious meal. The combination of golden garlic, bright lemon, and flaky tuna creates a balance that is truly timeless.
If you enjoyed this recipe, please leave a comment below and let us know how yours turned out! Don’t forget to follow us and share your creations on Pinterest so we can see your glossy pasta masterpieces.