When you dive into the world of pickling recipes, few results are as visually stunning or culinary versatile as the quick pickled red onion. These aren’t just a condiment; they are a vibrant, magenta-hued transformation that brings acidity, crunch, and a pop of color to any plate. If you have ever stared at a professional food photograph and wondered how those onions look so translucent yet firm, you are in the right place.
This specific guide focuses on the “refrigerator method,” a technique that bypasses the long fermentation times of traditional canning. By using a precise ratio of clear vinegar and balanced aromatics, we create a brine that preserves the “snap” of the onion. You will see the transformation from a raw purple bulb to glistening pink rings in less than thirty minutes.
Whether you are looking to brighten up a heavy meal or simply want to master the basics of pickling recipes, this tutorial provides the professional framework needed for success. We will explore the science of the brine, the importance of the vessel, and the sensory cues that signal a perfect pickle. Get your glass jars ready, because your pantry is about to get a major upgrade.
The Anatomy of a Perfect Magenta Pickle
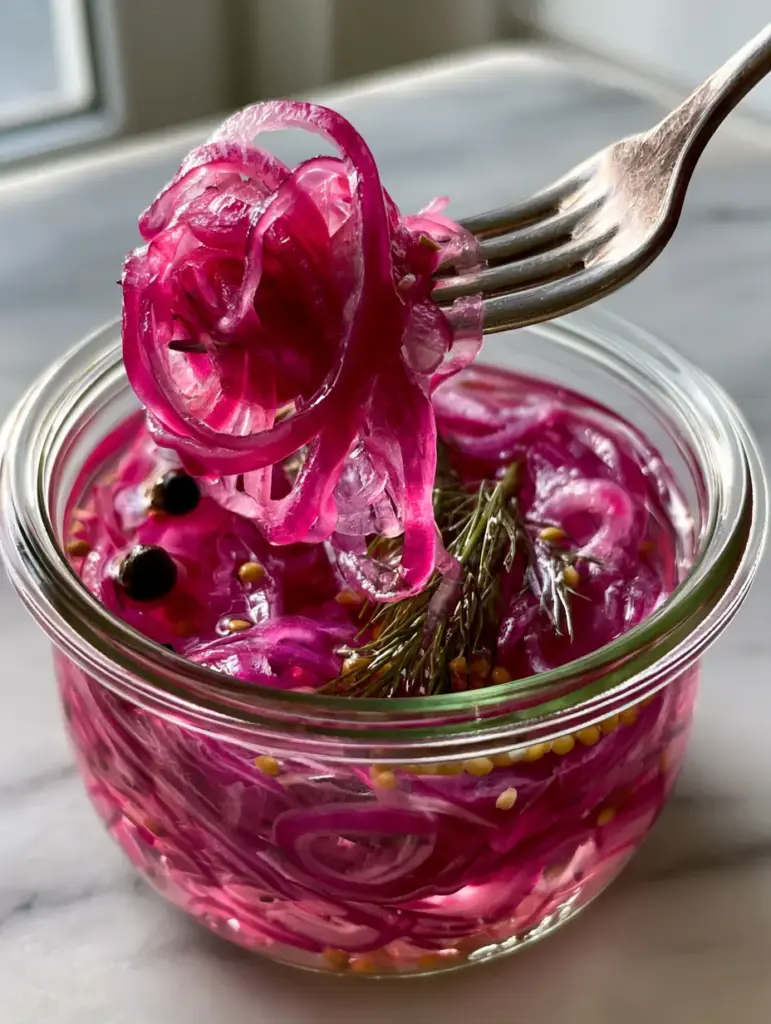
To achieve the visual results seen in high-end culinary photography, we must focus on the interplay of acid and pigment. Red onions contain anthocyanins, which react to the acidity of the vinegar by turning a brilliant, electric pink. This isn’t just a side effect; it is a hallmark of quality in pickling recipes.
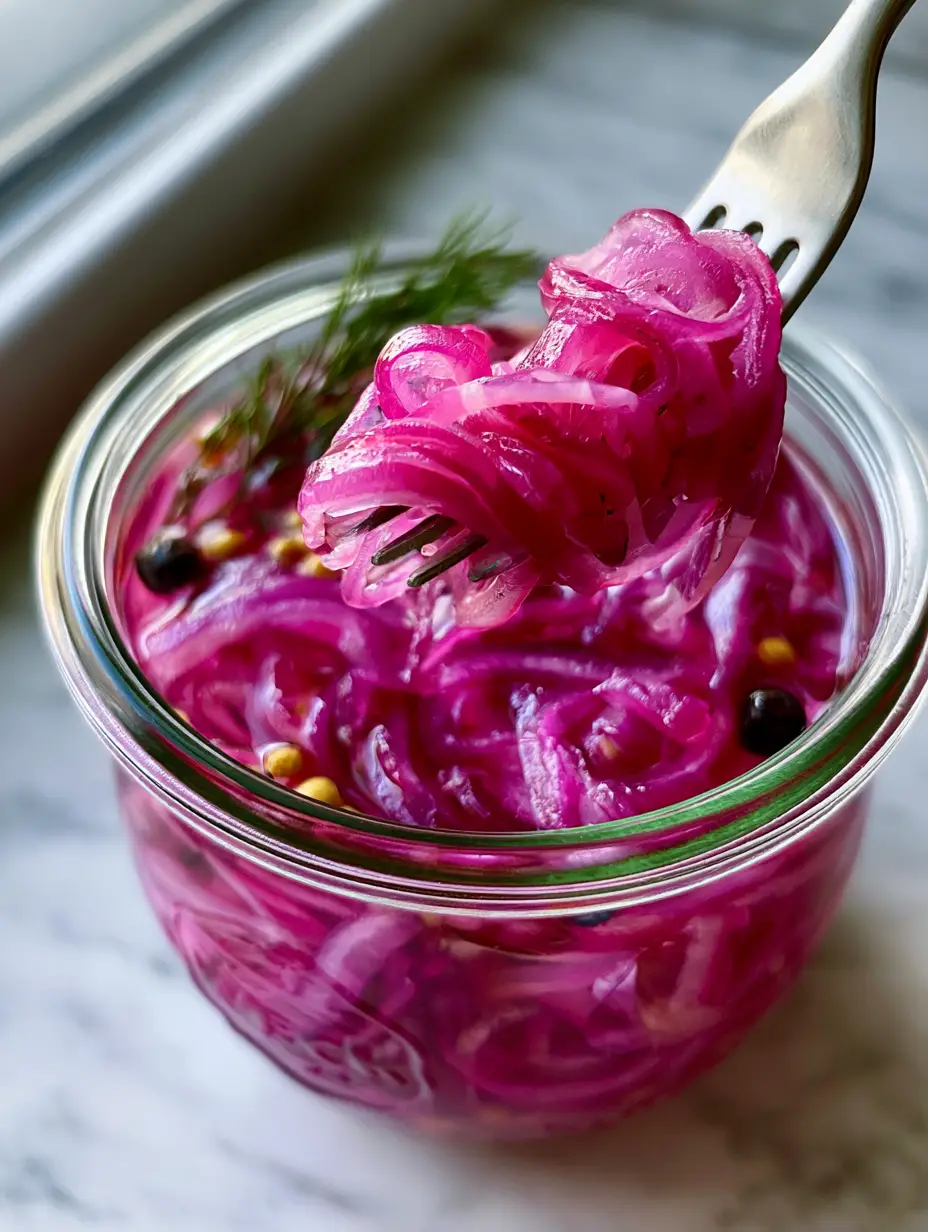
- The Translucent Texture: A properly pickled onion should be flexible enough to tangle on a fork but firm enough to provide a distinct “crunch” when bitten.
- The Crystal-Clear Brine: Unlike fermented pickles which can be cloudy, these quick pickles feature a liquid so clear you can see every peppercorn and mustard seed at the bottom of the jar.
- Glistening Highlights: The sugar in the brine isn’t just for flavor; it creates a slight viscosity that allows the liquid to cling to the onion rings, making them glisten under natural light.
- Aromatic Depth: The inclusion of whole black peppercorns, yellow mustard seeds, and fresh dill adds a sophisticated visual layer while providing subtle earthy undertones.
The Science-Backed Ingredient List for Pickling Recipes
In the world of professional pickling recipes, every ingredient serves a dual purpose: flavor and structural integrity. We don’t just add salt for taste; we add it to draw out moisture and preserve the onion’s cellular wall. Here is what you need to gather for this vibrant batch.
The Primary Aromatics and Base
2 large (500g) Red Onions: Choose onions that feel heavy for their size and have a tight, papery skin. These will yield the most vibrant magenta hue and provide the structural “snap” required for the perfect bite.
1.5 cups (355ml) White Distilled Vinegar: We use white vinegar specifically to maintain a crystal-clear brine. Other vinegars, like apple cider vinegar, can cloud the liquid and dull the neon-pink color of the onions.
1.5 cups (355ml) Filtered Water: Using filtered water ensures no mineral aftertaste interferes with the clean acidity of the brine. This 1:1 ratio is the golden standard for balanced pickling recipes.
The Flavor Enhancers and Visual Elements
2 tbsp (25g) Granulated Sugar: Sugar balances the harshness of the acetic acid. It also helps the onions retain their moisture, ensuring they look glistening and fresh rather than shriveled.
1.5 tsp (9g) Fine Sea Salt: Salt is the primary preservative and flavor catalyst. It draws out the raw onion “bite” and replaces it with a seasoned, savory profile.
1 tsp (3g) Whole Black Peppercorns: These provide a slow-blooming heat and look beautiful settled at the base of your glass Weck jar. Do not use ground pepper, as it will turn your brine gray.
1 tsp (3g) Yellow Mustard Seeds: These add a classic “deli” aroma and a pop of yellow that contrasts beautifully with the magenta onions. They contain natural thickeners that slightly improve the brine’s mouthfeel.
1 fresh Sprig of Dill: A single sprig adds a herbal top note that cuts through the sharp vinegar. Visually, the feathery green texture signifies freshness to anyone peering into the jar.
Essential Equipment for a Clear Result
While you don’t need a lab, certain tools make pickling recipes much easier and more consistent. To get those perfectly thin, uniform rings, a mandoline slicer is highly recommended, though a very sharp chef’s knife and a steady hand will work.
The most important piece of equipment is your storage vessel. A clear glass Weck jar is the gold standard for aesthetics and functionality. Its wide mouth allows you to easily lift a tangle of onions out with a stainless steel fork, and the glass is non-reactive, meaning the vinegar won’t leach any metallic tastes into your food.
You will also need a small stainless steel saucepan to heat the brine. Avoid aluminum or copper pots, as the high acidity of the vinegar can react with the metal, discoloring your onions and ruining the flavor profile. A simple whisk will help dissolve the sugar and salt efficiently.
Step-by-Step Instructions: Mastering the Magenta Hue
Follow these steps precisely to ensure your onions go from raw to restaurant-quality. Pay close attention to the visual cues described, as these will tell you exactly when your pickling recipes are progressing correctly.
Step 1: Precision Slicing for Maximum Surface Area
Peel the red onions and trim the root ends. Using a mandoline or a sharp knife, slice the onions into very thin, uniform rings, approximately 1/8 inch (3mm) thick. Uniformity is key here; if the slices are different thicknesses, they will pickle at different rates.
Once sliced, use your fingers to gently separate the rings. They should feel crisp and slightly spicy to the smell. Place the separated rings into your clean Weck jar, packing them down gently but leaving enough room for the liquid to circulate between the layers.
Step 2: Preparing the Crystal-Clear Brine
In your stainless steel saucepan, combine the white vinegar, water, sugar, and sea salt. Place the pan over medium-high heat. Whisk the mixture constantly until you see the liquid transition from cloudy to completely transparent.
This is a critical sensory cue: once the liquid is boiling and perfectly clear, remove it from the heat. You do not want to boil it for long, as excessive evaporation will change the acidity ratio of your pickling recipes.
Step 3: Infusing with Aromatics
Before pouring the liquid, drop the whole black peppercorns and yellow mustard seeds into the jar over the onions. Tuck the fresh dill sprig down the side of the glass so it is visible from the outside. This ensures the spices are distributed as the liquid fills the gaps.
Carefully pour the hot brine over the onions until they are completely submerged. You will notice the onions immediately begin to soften and lose their opaque white centers. Use a stainless steel fork to press the onions down, ensuring no air bubbles are trapped at the bottom of the jar.
Step 4: The Cooling and Transformation Phase
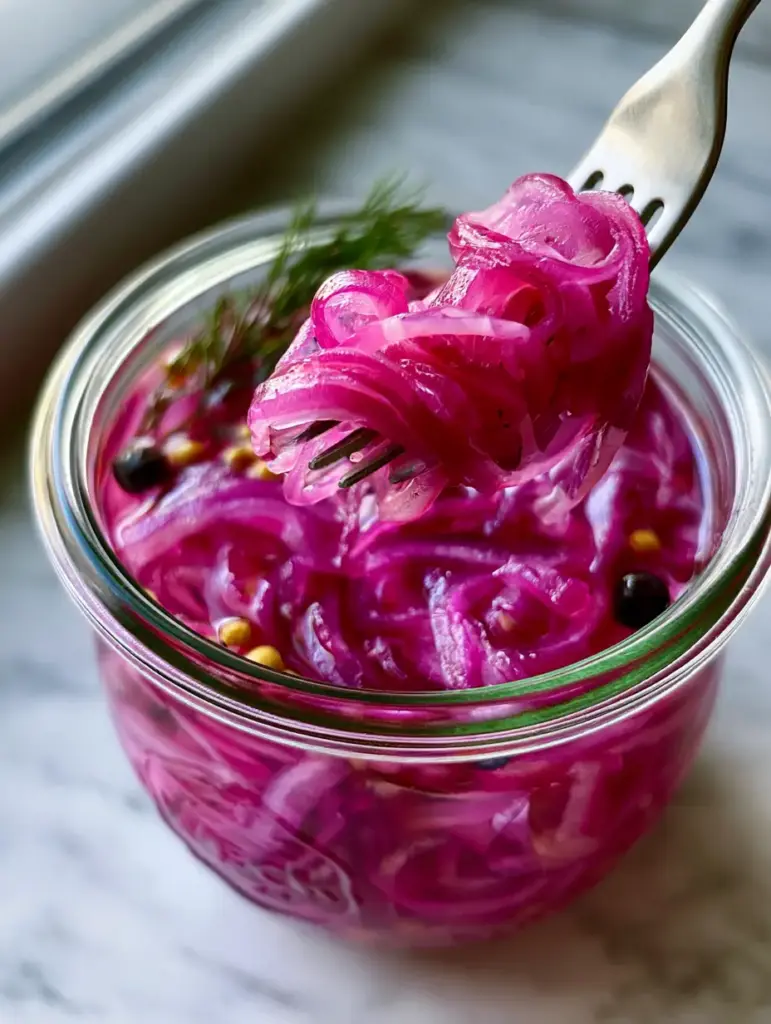
Let the jar sit uncovered at room temperature for about 20-30 minutes. During this time, watch the color shift. The onions will transition from a deep purple to a vibrant, translucent pink. The heat of the brine facilitates this rapid exchange of pigments.
Once the jar is cool to the touch, seal it and move it to the refrigerator. While they are edible after 30 minutes, the flavor and “magenta glow” will reach their peak after 24 hours of chilling.
Expert Tips for Pickling Success
- Don’t Overcook the Onions: Never boil the onions in the brine. Pouring the hot liquid over raw onions preserves their “firm texture” and ensures they don’t turn into mush.
- Weight Them Down: If your onions keep floating to the top, you can use a small glass fermentation weight or even a folded piece of parchment paper to keep them submerged in the brine.
- Vinegar Variations: If you find white vinegar too sharp, you can substitute half of it with rice vinegar. This is a common trick in pickling recipes to achieve a softer, sweeter finish.
- The “Fork Test”: Use a stainless steel fork to lift a few rings. They should drape over the tines like a ribbon but still offer a slight resistance when pulled.
Creative Ways to Use Your Pickled Red Onions
Now that you have mastered one of the most versatile pickling recipes, it’s time to put those onions to work. Their acidity makes them the perfect foil for rich, fatty meats and earthy vegetables.
For a hearty meal, try layering these pink rings onto thinly sliced ribeye steak recipes or use them to cut through the richness of a steak sandwich recipe. The sharp vinegar brine acts as a palate cleanser between bites of savory beef.
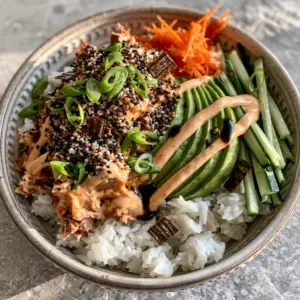
They also provide a much-needed zing to a korean beef bowl or can be tossed into a fresh vinegar cucumber salad for extra color. If you are preparing a large spread, these onions are a staple for beef dinner recipes and even provide a bright contrast to sautéed vegetables.
Storage and Shelf Life
Because these are refrigerator pickles and not processed in a water bath for long-term shelf storage, they must be kept chilled. In a sealed glass jar, these pickled onions will stay crisp and vibrant for up to 3 weeks.
Over time, the dill sprig may darken; this is normal. However, if the brine ever becomes cloudy or develops an “off” smell, it is time to discard the batch and start fresh. Luckily, pickling recipes this simple take very little time to recreate.
Frequently Asked Questions
Yes, you can omit the sugar or use a keto-friendly sweetener like allulose. However, sugar helps the onions retain a glistening appearance and balances the sharp acidity of the white vinegar.
No! Pouring the hot brine over the raw onions is the secret to a firm texture. Boiling the onions directly will cook them, making them soft and removing that signature ‘snap’.
When stored in a sealed glass jar like a Weck jar, they will remain crisp and flavorful for 2 to 3 weeks. They are best within the first 7 days for maximum crunch.
For the clearest brine and most neutral flavor, distilled white vinegar is best. If you prefer a milder, fruitier taste, you can use rice vinegar or apple cider vinegar, though the brine may be slightly tinted.
This usually happens if you use old onions or a reactive pot (like aluminum). Always use fresh red onions and a stainless steel saucepan to ensure the anthocyanins react correctly to turn vibrant magenta.
The Ultimate Quick Pickled Red Onion Recipe
Pickling Recipes: The Ultimate Guide to Vibrant Quick Pickled Red Onions
Ingredients
Equipment
Method
- Peel and thinly slice red onions into 1/8 inch rings using a mandoline. Place them into a clean glass Weck jar.
- Add peppercorns, mustard seeds, and the dill sprig to the jar, ensuring they are distributed among the onion rings.
- Combine vinegar, water, sugar, and salt in a saucepan. Heat over medium until the liquid is boiling and crystal clear.
- Pour the hot brine over the onions. Use a stainless steel fork to press onions down until glistening and fully submerged.
- Let cool to room temperature until the onions turn vibrant magenta. Seal and refrigerate for at least 30 minutes before serving.
Notes
Onions are best after 24 hours but ready in 30 minutes.
Bring More Color to Your Kitchen
Mastering pickling recipes is a gateway to becoming a more intuitive cook. By understanding how acid, salt, and sugar interact with fresh produce, you can create condiments that elevate every meal from ordinary to extraordinary. These magenta onions are just the beginning!
If you enjoyed this tutorial, please leave a comment below and let me know how you used your pickled onions. Don’t forget to share your vibrant jar photos on Pinterest and follow Honest Food Craving for more culinary inspiration and technical guides!