Experience the ultimate sensory delight with this artisan chocolate mochi. This recipe combines the traditional Japanese technique of glutinous rice dough with a modern, decadent twist: a glossy, molten dark chocolate ganache core.
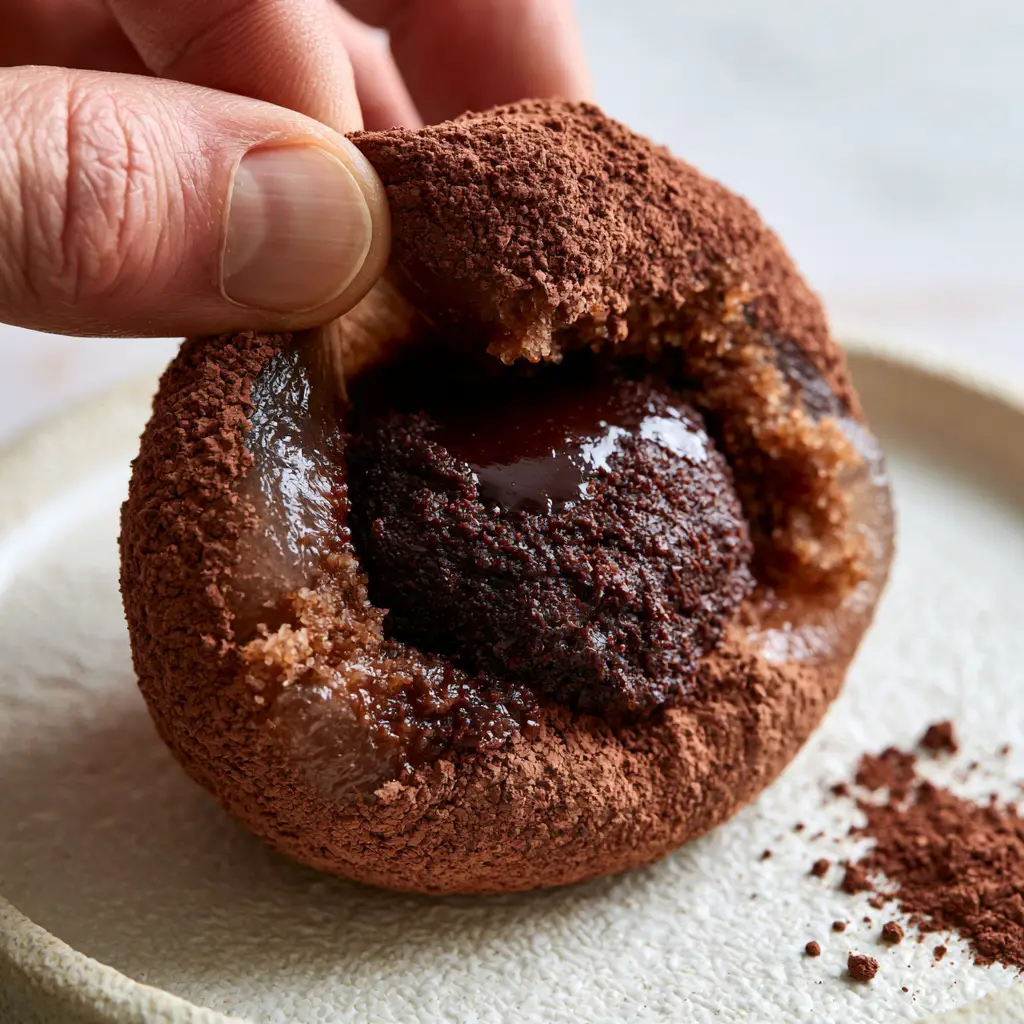
The first bite offers a velvety encounter with a thick dusting of unsweetened cocoa powder. As you pull the dough apart, you will witness the extreme elasticity and “QQ” texture that defines high-quality mochi, revealing a core that flows like liquid silk.
This isn’t just a snack; it’s a culinary exploration of textures. From the matte, powdered exterior to the translucent cocoa-brown dough and the shiny, dense interior, every element is designed to captivate your palate and your camera lens.
Why This Chocolate Mochi Recipe Stands Out
- The Ultimate QQ Texture: We use specific hydration ratios to ensure an extremely stretchy and elastic dough that remains soft for hours.
- Double Chocolate Profile: A chocolate-infused dough paired with a high-percentage dark chocolate ganache for a sophisticated, less-sweet flavor.
- Forensic Visual Appeal: Designed to mimic the handheld macro aesthetic, featuring a translucent cocoa-brown finish and a velvety matte dusting.
- Accessible Gourmet: Professional results achieved with simple tools and precise culinary science.
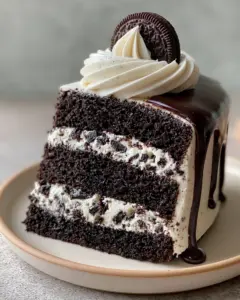
If you have a passion for deep, dark cocoa flavors, you might also find yourself reaching for our decadent chocolate oreo cake on your next baking day.
Foundational Elements for the Molten Core and Elastic Dough
To achieve the visual and structural results of the blueprint, every ingredient serves a technical purpose. We are not just mixing flavors; we are managing starch and fat emulsions.
Mochiko (Glutinous Rice Flour): 1 ½ cups (200g). This is the backbone of the recipe, providing the characteristic stretch and translucency that regular rice flour cannot achieve.
Dark Unsweetened Cocoa Powder: ½ cup (45g), divided. High-quality Dutch-processed cocoa ensures a deep brown hue in the dough and a bitter, velvety contrast on the exterior.
Granulated Sugar: ½ cup (100g). Sugar is a humectant here, keeping the rice starches from recrystallizing and becoming hard too quickly.
Filtered Water: 1 cup (240ml). Essential for hydrating the Mochiko starches during the steaming process to reach that “soft, translucent” state.
Dark Chocolate (70% Cacao): 4 oz (115g). The high cocoa butter content is vital for a glossy, dense ganache that melts perfectly at room temperature.
Heavy Cream: 1/3 cup (80ml). This provides the fat needed to emulsify with the chocolate, creating a stable yet molten interior.
Sea Salt: A pinch (approx. 1g). Salt balances the bitterness of the dark cocoa and enhances the perception of sweetness in the ganache.
Neutral Oil: 1 tsp (5ml). A small amount of flavorless oil in the dough prevents excessive sticking and adds a subtle sheen to the translucent dough.
For those looking for more cocoa-forward treats that are a bit more rustic, our chocolate chip zucchini bread offers a wonderful textural contrast.
Essential Equipment for Mochi Mastery
Achieving the perfect chocolate mochi requires more than just a bowl. These tools help manage the sticky nature of the dough and the temperature of the ganache.
A heat-proof glass bowl is necessary for steaming the dough, while a silicone spatula is non-negotiable for folding the hot, elastic mass without tearing. You will also need a fine-mesh sieve to achieve that perfectly even, velvety cocoa dusting seen in the visual blueprint.
Finally, a small cookie scoop (approx. 1 tbsp capacity) ensures your ganache centers are uniform, making the assembly process much cleaner and more professional.
Crafting the Glossy Dark Chocolate Ganache
Step 1: Emulsifying the Molten Core
Finely chop 4 oz (115g) of dark chocolate and place it in a small heat-proof bowl. In a small saucepan, bring 1/3 cup (80ml) of heavy cream to a gentle simmer—look for small bubbles forming at the edges, but do not let it boil over.
Pour the hot cream over the chocolate and let it sit undisturbed for 5 minutes. This allows the heat to penetrate the chocolate solids without introducing air bubbles.
Slowly whisk from the center outward until a dense, glossy, and smooth emulsion forms. Transfer this ganache to the refrigerator for about 60 minutes until it is firm enough to scoop but still pliable.
Preparing the Elastic Chocolate-Infused Dough
Step 2: Mixing the Base
In your heat-proof glass bowl, whisk together 1 ½ cups (200g) of Mochiko, ½ cup (100g) of sugar, and 2 tbsp (12g) of the cocoa powder. Slowly whisk in 1 cup (240ml) of water and 1 tsp (5ml) of oil until no lumps remain.
The mixture should look like a thin, dark chocolate batter. Ensure the sides of the bowl are scraped down so the dough cooks evenly throughout.
Step 3: The Steaming Process
Cover the bowl with plastic wrap (leaving a small vent) or a damp cloth. Place the bowl in a steamer over boiling water for 15-18 minutes.
Visual Cue: The dough is ready when it transforms from a matte liquid into a soft, translucent cocoa-brown mass that is slightly darker and holds its shape when stirred.
Step 4: Kneading for QQ Texture
This is the secret to the “extremely stretchy” result. While the dough is still hot, use a silicone spatula to vigorously stir and fold the dough for 2-3 minutes. This mechanical action develops the elasticity of the starches, resulting in that sought-after QQ bounce.
Assembly and the Final Cocoa Dusting
Step 5: Porting and Filling
Generously dust your work surface with the remaining dark cocoa powder. Turn the hot dough onto the powder. The dough will be very tacky, so keep your hands dusted with cocoa at all times.
Divide the dough into 12 equal pieces. Flatten a piece into a disk, making the edges slightly thinner than the center. Place a chilled scoop of ganache in the middle.
Gently pull the edges of the elastic dough over the filling, pinching the bottom to seal. The dough should feel incredibly supple and stretchy as you work with it.
Step 6: The Velvet Finish
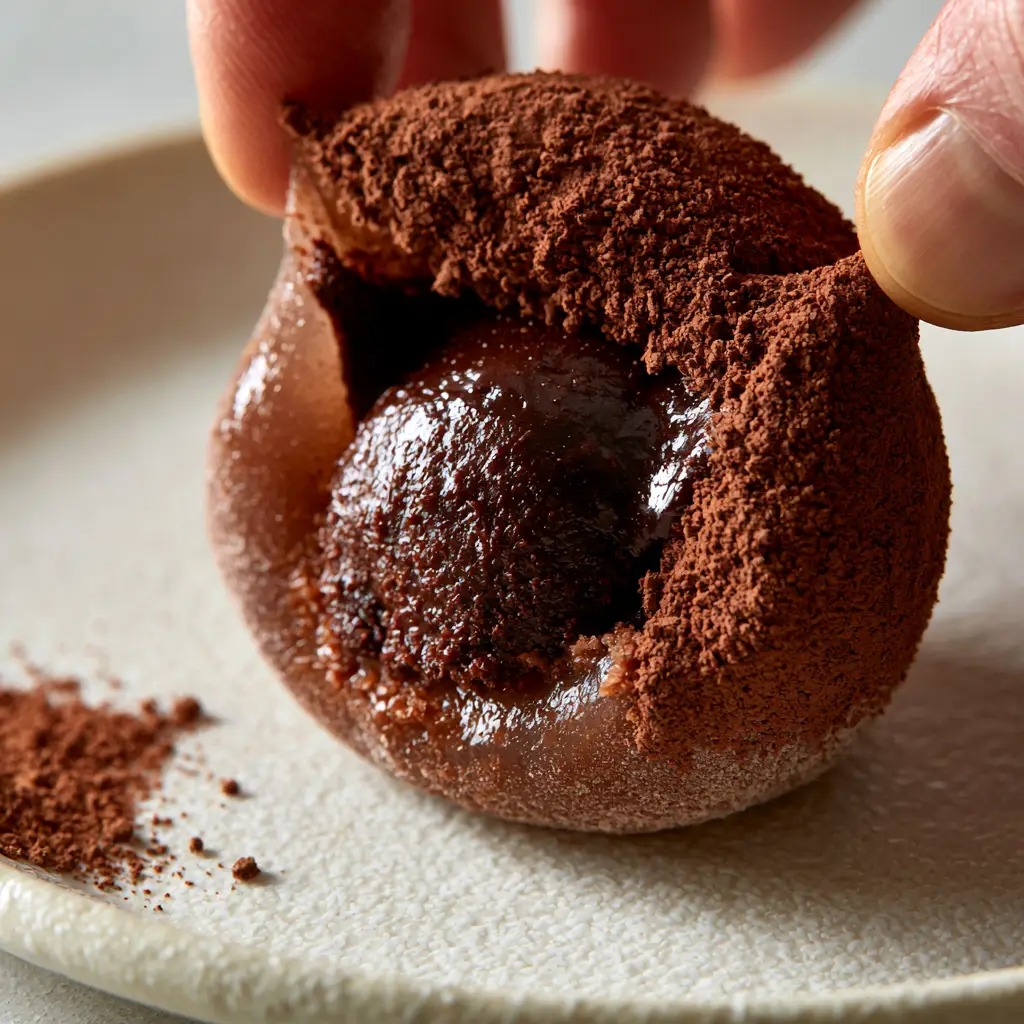
Roll the assembled chocolate mochi in a final layer of unsweetened cocoa powder. Use a soft brush to remove any excess grains, leaving a thick, velvety matte finish that contrasts beautifully with the glossy interior revealed upon the first pull.
Expert Tips for Success
- Temperature Control: Never try to fill the mochi with warm ganache. The heat from the dough will cause the ganache to liquefy instantly, making it impossible to seal.
- Handling Stickiness: If the dough is sticking to everything, you likely need more cocoa powder on your hands. Avoid using flour, as it will ruin the flavor and color.
- Starch Science: Use only “Glutinous” rice flour. Regular rice flour or “sweet rice flour” that isn’t specifically for mochi will result in a gritty, cake-like texture rather than an elastic one.
- The Perfect Pull: For the best macro photo, pull the mochi apart while it is at room temperature. This ensures the ganache is at its most molten and the dough is at peak elasticity.
Storage, Reheating, and Freshness
Chocolate mochi is best enjoyed within 24 hours of making. The high starch content in the rice dough will eventually begin to “retrograde,” or harden, especially if exposed to air.
Store leftovers in an airtight container at room temperature. Do not refrigerate the finished mochi, as the cold will make the dough tough and the ganache center solid rather than molten.
If you must keep them longer, you can freeze them for up to two weeks. Thaw at room temperature for 2-3 hours before serving to restore the elastic texture.
What to Pair With Your Chocolate Mochi
To balance the intense richness of the dark chocolate, consider serving these as a refined dessert after a vibrant, savory meal. The acidity and crunch of an Asian cucumber salad provide a refreshing palate cleanser.
For a full themed dinner, these follow a savory Korean beef bowl exceptionally well. If you are looking for more bite-sized inspirations, check out our collection of 3-ingredient snacks for quick afternoon cravings.
Frequently Asked Questions
No, regular rice flour lacks the necessary starch profile to become stretchy. It will produce a crumbly, stiff texture rather than the elastic, translucent dough required for mochi.
Use a generous amount of dark cocoa powder or cornstarch on your hands and work surface. A silicone spatula and oil in the dough also help manage the tackiness.
Homemade mochi is best within 24 hours. Because it lacks commercial preservatives, the starch will begin to harden (retrograde) after the first day.
The ‘QQ’ texture comes from the high amylopectin content in glutinous rice flour, which becomes extremely elastic when hydrated and steamed. Vigorously kneading the hot dough further develops this bounce.
If the ganache is too cold, it will remain solid. For the best molten effect, let the finished mochi sit at room temperature for at least 30 minutes before serving so the fats can soften.
The Ultimate Chocolate Mochi Recipe
Chocolate Mochi with Molten Dark Chocolate Ganache Filling
Ingredients
Equipment
Method
- Pour hot cream over chopped chocolate; let sit for 5 minutes, then whisk until glossy.
- Refrigerate for 60 minutes until firm enough to scoop.
- Whisk Mochiko, sugar, 2 tbsp cocoa, water, and oil until smooth.
- Steam covered bowl for 15-18 minutes until translucent cocoa-brown.
- Vigorously stir hot dough for 2 minutes to develop elasticity and 'QQ' texture.
- Flatten dough disks on cocoa-dusted surface, add ganache scoop, and pinch to seal.
- Roll in extra dark cocoa powder for a matte finish.
Notes
Ensure ganache is fully chilled before attempting to wrap in hot dough.

Closing & Call to Action
This chocolate mochi recipe is a testament to how simple ingredients can create a complex, professional-grade dessert. With its molten center and incredibly chewy dough, it is guaranteed to be a favorite for both the cook and the lucky tasters.
Did you achieve that perfect, stretchy pull? Let us know in the comments below! If you loved this recipe, please share your photos on Pinterest and tag us.
Don’t forget to sign up for our newsletter for more deep dives into the science of delicious home cooking.