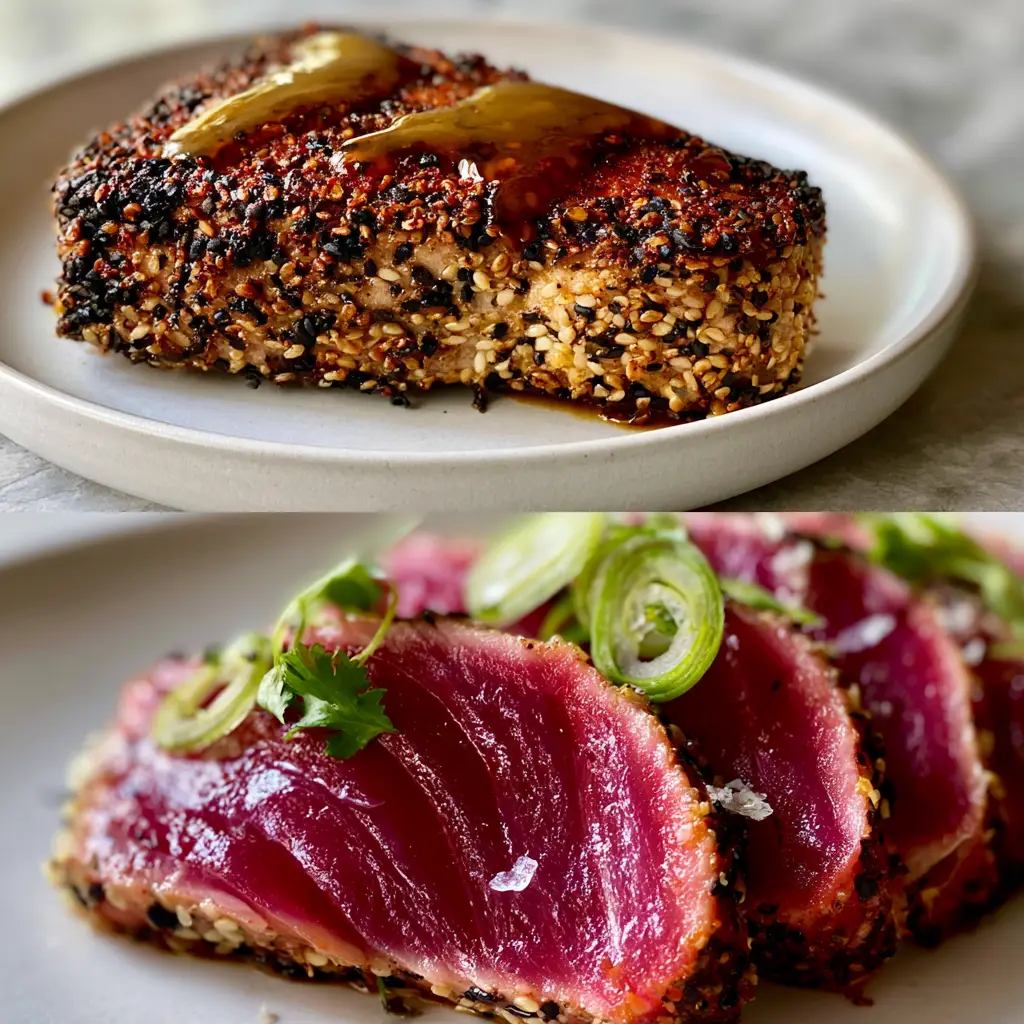
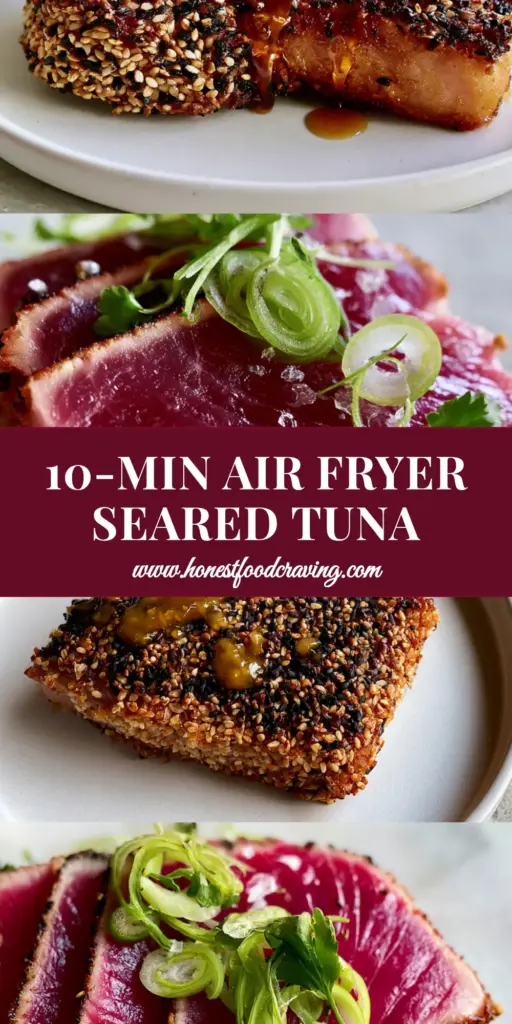
Mastering the perfect Tuna Steaks is the ultimate culinary “mic drop” for any home cook. Imagine a dish that looks like it belongs on a $60 prix-fixe menu, featuring a thick, crunchy crust of black and white sesame seeds and a center so vibrantly magenta-pink it looks like a gemstone.
The secret to this restaurant-quality result lies in the contrast of temperatures and textures. You are aiming for a high-intensity, deep golden-brown sear on the outside while maintaining a cool, buttery, and raw interior that melts on the tongue.
In this guide, we are going to break down the science of the 60-second sear. We will ensure your Tuna Steaks achieve that iconic “split-view” look: a crispy, savory exterior transitioning instantly into a stunningly raw, tender core, finished with a viscous ginger-soy drizzle.
Why This Ahi Tuna Recipe Works
- The Crunch Factor: By using a dual-blend of black and white sesame seeds, we create a multi-dimensional crust that provides a satisfying snap in every bite.
- Visual Contrast: The vibrant magenta-pink center against the golden-brown seared edges creates a professional plating aesthetic that is impossible to ignore.
- Umami Bomb Glaze: A reduced ginger-soy glaze provides a glossy, artistically drizzled finish that balances the richness of the fish with salt and heat.
- Speed: From start to finish, these Tuna Steaks take less than 15 minutes, making it a high-reward meal for busy weeknights or impressive dinner parties.
Pantry Essentials for Restaurant-Quality Tuna
Sushi-Grade Ahi Tuna Steaks: You will need 2 large steaks, about 1-inch (2.5cm) thick. Ensuring they are sushi-grade is non-negotiable for safety since the center remains raw.
Black and White Sesame Seeds: We use 3 tbsp (27g) of each to create that dense, mosaic-like crust. The white seeds will toast to a golden brown, signaling when the sear is perfect.
Avocado Oil: Use 2 tbsp (30ml) for searing. Its high smoke point (520°F/270°C) allows us to get the pan screaming hot without the oil breaking down or smoking out the kitchen.
Low-Sodium Soy Sauce: This forms the base of our glossy glaze. Using low-sodium allows us to control the salinity without overwhelming the delicate flavor of the fish.
Fresh Ginger and Garlic: Grating these directly into the glaze provides an aromatic punch that cuts through the fat of the tuna.
Honey or Mirin: To achieve that viscous, “cling-to-the-spoon” consistency in the glaze, 1 tbsp (21g) of honey is essential for the reduction process.
Garnish Components: You must have paper-thin scallion rounds, tiny sprigs of micro-cilantro, flakes of sea salt, and a fresh lime wedge to replicate the professional visual blueprint.
The Professional Toolkit
To achieve the “Forensic Visual Accuracy” described, you cannot rely on a standard non-stick pan. You need a Heavy-Bottomed Cast Iron Skillet. Cast iron retains heat better than any other material, ensuring that the second the sesame seeds hit the surface, they begin to toast rather than steam.
You will also need a Microplane for the ginger and garlic. This ensures the aromatics are fine enough to melt into the glaze, creating a smooth, glossy finish without chunky bits of fiber. Finally, a Sharp Chef’s Knife is critical for slicing the tuna into thick ribbons without tearing the delicate raw interior.
Mastering the Art of the 60-Second Sear
Preparing the Tuna Canvas
Start by patting your Tuna Steaks bone-dry with paper towels. Moisture is the enemy of a good sear; if the fish is damp, it will steam rather than crust.
In a shallow bowl, combine your black and white sesame seeds with a pinch of sea salt. Press each side of the tuna firmly into the seeds until a thick, even layer adheres to the entire surface of the fish.
Building the Glossy Ginger-Soy Drizzle
While the fish rests for a moment, combine 1/4 cup (60ml) soy sauce, grated ginger, garlic, and honey in a small saucepan over medium heat. Simmer until the liquid reduces by half and coats the back of a spoon—this is how you get that artistic, viscous drizzle seen in the visual prompt.
The High-Heat Transformation
Heat your cast iron skillet with the avocado oil until it is just beginning to wisps of smoke. This is the sensory cue that the pan is ready for the Tuna Steaks.
Lay the steaks in the pan. Listen for a loud, aggressive sizzle. For a perfect vibrant pink center, sear for exactly 45 to 60 seconds per side. Do not move them until it is time to flip to ensure the sesame seeds form a structural crust.
The Final Artistic Presentation
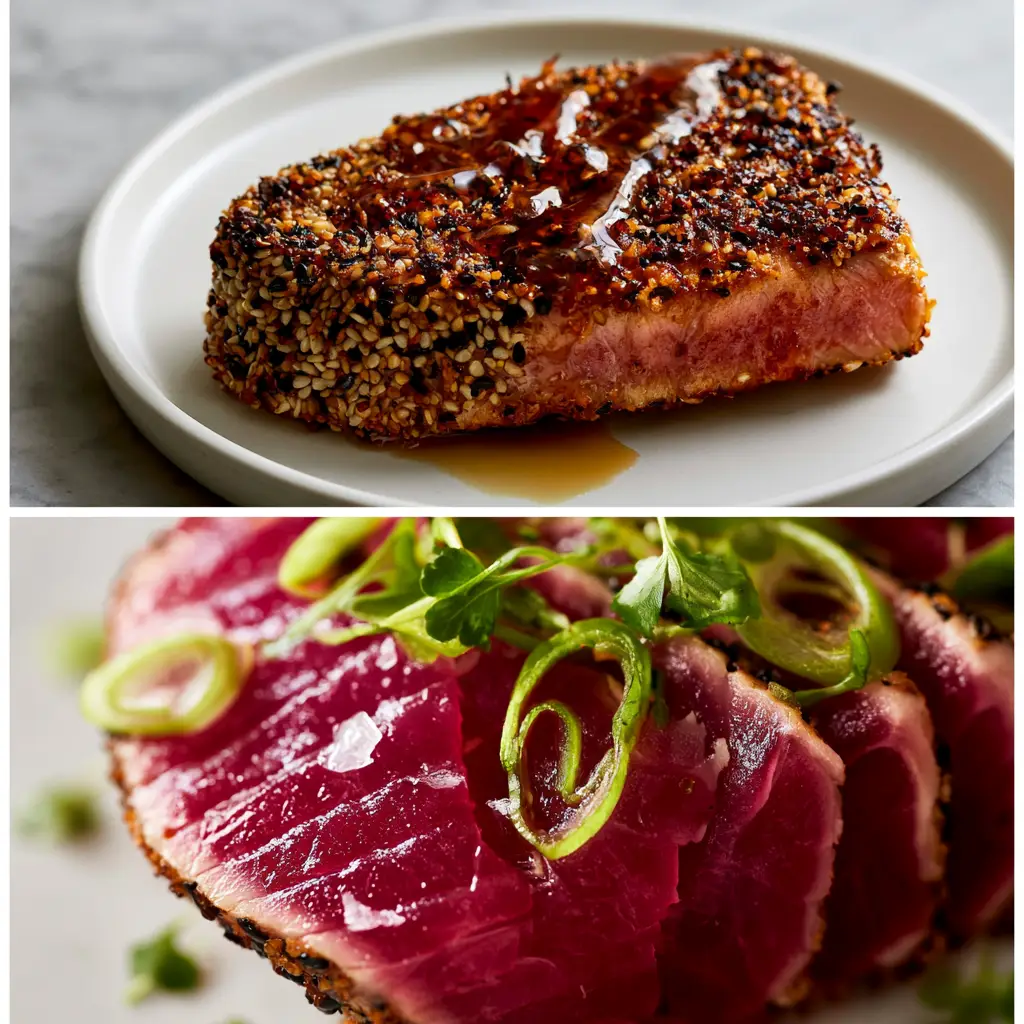
Once seared, transfer the fish to a cutting board. Use your sharpest knife to slice the tuna into 1/2-inch (1.25cm) thick ribbons. This reveals the stunning contrast between the golden crust and the magenta core.
Secrets for Searing Success
- Cold Tuna is Key: Unlike steak, you want the tuna to be cold when it hits the pan. This helps keep the center raw and vibrant while the outside gets hot and crispy.
- Don’t Overcrowd: Cook one or two steaks at a time. Adding too many cold fish steaks to the pan will drop the temperature, ruining your chance at a crunchy crust.
- The Visual Check: Watch the side of the steak. You only want to see 2-3mm of cooked grey-white meat before you flip. The rest should stay deep pink.
- Resting: Do not rest tuna as long as you would beef. If you let it sit too long, the residual heat will continue to cook the interior, turning your magenta center to a dull grey.
Preserving Your Masterpiece
Seared Tuna Steaks are best enjoyed immediately to appreciate the temperature contrast of the hot crust and cold center. However, if you have leftovers, store them in an airtight container for no more than 24 hours.
To “reheat,” do not use a microwave. Instead, enjoy the leftovers cold by slicing them thinly over a spicy tuna bowl or adding them to a refreshing cucumber and tomato salad. This preserves the texture of the fish without overcooking it.
Perfect Pairings for a Balanced Plate
To round out this meal, serve your Tuna Steaks alongside a light, acidic side dish. The richness of the sesame oil and tuna benefits greatly from a bright contrast. We recommend a simple tuna pasta side if you are feeling indulgent, or a light citrus-dressed slaw.
For a complete Asian-inspired spread, consider starting with a small bowl of edamame or a crisp canned tuna pasta salad for extra protein variety.
Answering Your Searing Questions
Absolutely. Just ensure they are fully thawed in the refrigerator and patted extremely dry with paper towels before you attempt to apply the sesame crust, otherwise the seeds won’t stick.
Yes. Because this recipe calls for a very brief sear that leaves the center raw, you must use ‘sushi-grade’ or ‘sashimi-grade’ tuna to ensure it has been handled and frozen properly to eliminate parasites.
Look at the side of the steak while searing. Once you see a thin 2-3mm layer of opaque, light-colored meat creeping up from the bottom, it’s time to flip. This usually takes about 45-60 seconds.
Avocado oil is the best choice because it has an extremely high smoke point. This allows you to get the pan hot enough to toast the sesame seeds without the oil burning or becoming bitter.
This usually happens if the fish was too wet or if you moved the steak too much in the pan. Press the seeds firmly into the meat and let it sear undisturbed for the full minute to set the crust.
The Ultimate Sesame-Crusted Ahi Tuna Recipe
Tuna Steaks with a Toasted Sesame Crust and Glossy Ginger-Soy Glaze
Ingredients
Equipment
Method
- Pat the tuna steaks extremely dry with paper towels to ensure a crispy crust.
- Mix black and white sesame seeds in a bowl and press the tuna into the seeds until fully coated.
- Heat avocado oil in a cast iron skillet until smoking. Sear tuna for 60 seconds per side until seeds are golden-brown.
- In a separate pan, simmer soy sauce, honey, and ginger until thickened into a glossy glaze.
Notes
Always buy sushi-grade tuna when serving rare.
Join the Honest Food Community
If you’ve successfully mastered these Tuna Steaks, we want to see your stunning magenta centers! Tag us in your photos or leave a comment below with your favorite way to serve Ahi.
For more restaurant-quality recipes at home, sign up for our newsletter and don’t forget to save this recipe to your “Dinner Goals” board on Pinterest.