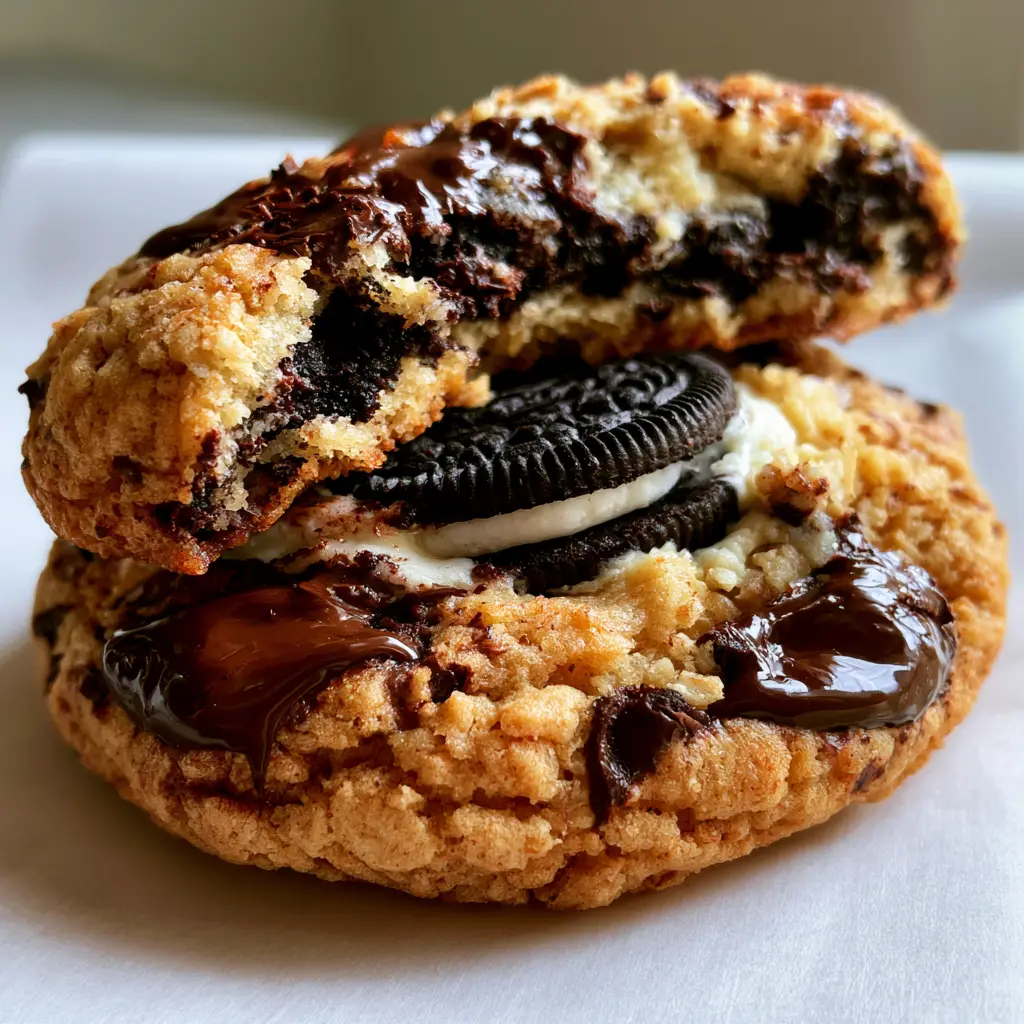
There is a specific kind of magic that happens when two iconic desserts collide. These Oreo stuffed chocolate chip cookies are not just a simple hybrid; they are a culinary feat of engineering designed for the true dessert enthusiast. Imagine biting into a warm, golden-brown crust that shatters slightly under your teeth, only to find a molten pool of dark chocolate and a whole, soft double-stuffed Oreo hidden inside. This recipe focuses on creating a high-domed, thick cookie that holds its shape while maintaining a soft, pillowy interior that perfectly encases that famous cream-filled biscuit.
The visual appeal of these cookies is undeniable. We are aiming for a deeply textured, cracked crust that looks as if it came straight from a high-end Manhattan bakery. By using specific chilling techniques and a blend of high-quality chocolates, we ensure that every handheld experience is a symphony of textures—from the crunch of the black cocoa biscuit to the warm, melting white cream filling. Whether you are a seasoned baker or looking for a showstopper for your next gathering, this guide will walk you through the science of the perfect stuffed cookie.
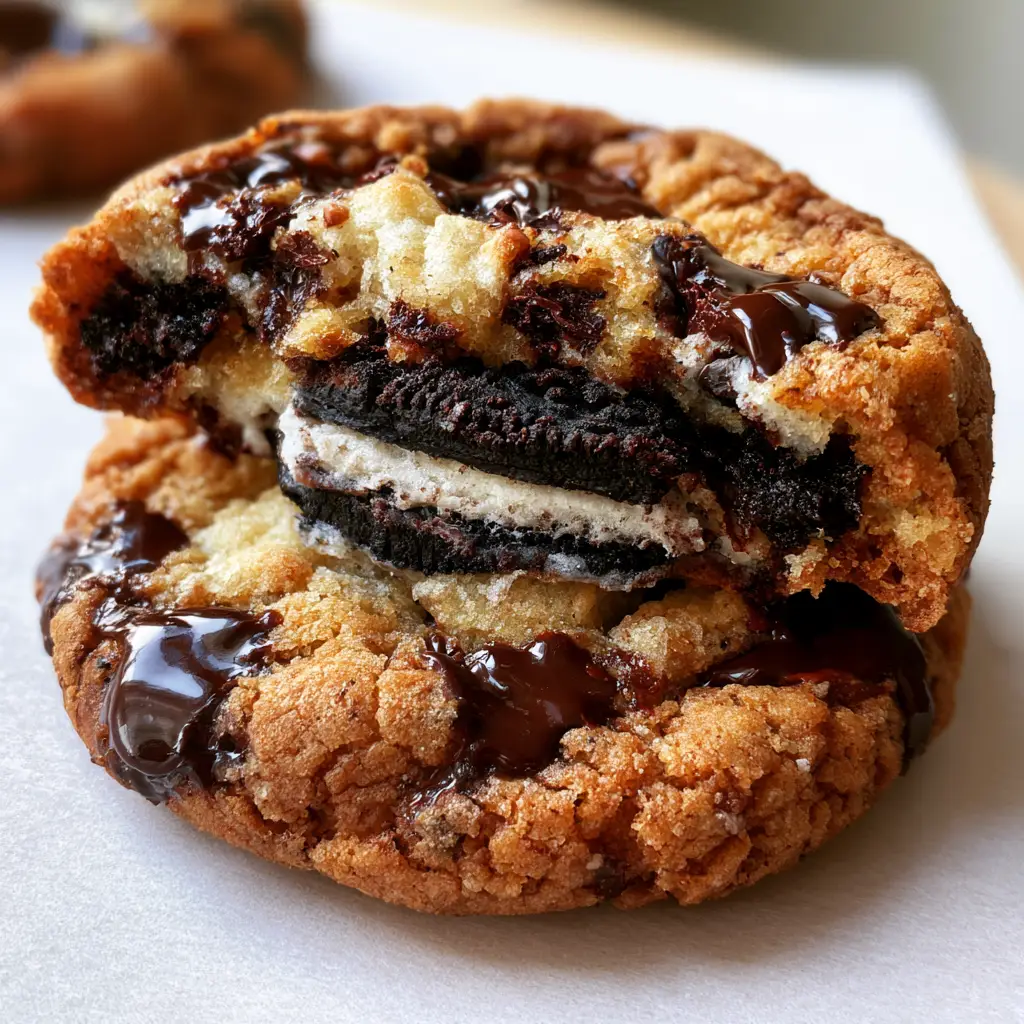
When you break one of these giants in half, the visual contrast is stunning. The golden hue of the buttery dough sits against the dark, glistening pools of chocolate, while the center reveals the distinct white-and-black layers of the Oreo. To elevate the flavor profile and balance the intense sweetness, a generous sprinkle of flaky sea salt is the final, essential touch. Get ready to master the art of the “cookie-within-a-cookie” with this professional-grade recipe.
Why This Stuffed Cookie Recipe Outperforms Every Other Version
- Extreme Thickness: We utilize a specific ratio of flours and cold butter to ensure these cookies stand tall and thick, preventing the “pancake effect” common in lesser recipes.
- The Double-Stuff Factor: By specifically choosing double-stuffed Oreos, we guarantee a visible, melting white cream center that stays soft even after the cookie cools.
- Textural Contrast: The combination of a crispy exterior, a chewy middle, and the snap of a cocoa biscuit provides a complex sensory experience in every bite.
- Gourmet Visuals: With melted dark chocolate pools and a flaky sea salt garnish, these cookies look as good as they taste, perfect for food photography.
The Secret Pantry Staples for Thick, Bakery-Style Cookies
Achieving the massive, thick structure seen in our Oreo stuffed chocolate chip cookies requires more than just standard ingredients; it requires an understanding of how proteins and fats interact under heat. Each component in this list has been carefully selected to support the weight of the Oreo while maintaining a soft crumb.
All-Purpose Flour and Cake Flour (300g / 150g): This blend is the secret to a “Levain-style” cookie. The all-purpose flour provides the necessary structure, while the lower protein in the cake flour ensures the cookie remains tender and doesn’t become tough or bread-like.
Unsalted Cold Butter (225g): Unlike many recipes that call for room-temperature butter, we use cold, cubed butter. This slows down the melting process in the oven, which significantly reduces spreading and helps create those beautiful craggy peaks on the crust.
Brown Sugar and Granulated Sugar (200g / 100g): A higher ratio of brown sugar adds moisture and a deep molasses undertone. This is what gives the cookie its characteristic chewiness and the golden-brown color described in our visual blueprint.
Double-Stuffed Oreos (12-14 cookies): These are the heart of the recipe. We use the double-stuffed variety because the extra cream filling creates a more prominent “soft white center” when the cookie is broken open.
Dark Chocolate Feves or Chopped Bars (200g): To achieve those “glistening, melted pools of dark chocolate,” avoid standard chips which contain stabilizers. High-quality chopped chocolate melts into fluid pools that stay soft for longer.
Cornstarch (1 tsp): This invisible workhorse is essential for a soft, professional texture. It breaks up the gluten bonds slightly, resulting in a cookie that is thick yet melts in your mouth.
Flaky Sea Salt (for garnish): Never skip the salt. The large flakes of Maldon or similar sea salt provide a sharp contrast to the rich chocolate and sweet cream, making the flavors pop.
Essential Equipment for Giant Cookie Success
To produce a cookie that looks exactly like our handheld smartphone photo, you need the right tools to handle the volume of the dough. You wouldn’t want to use the same tools you use for stuffed vegetable recipes, as baking requires precision in heat distribution.
A heavy-duty stand mixer is highly recommended for incorporating cold butter into the sugars. You will also need a digital kitchen scale for accuracy, as measuring flour by volume can lead to dry, crumbly cookies. For the baking process, a large, light-colored aluminum baking sheet is best for even browning without burning the bottoms. Finally, high-quality parchment paper is a must—not only for non-stick purposes but to replicate the “neutral white parchment” aesthetic of our visual prompt.
Engineering the Perfect Stuffed Center: Step-by-Step Instructions
Phase 1: Creaming the Foundation
In the bowl of your stand mixer, combine the cold, cubed butter with both the brown and granulated sugars. Beat on medium-high speed for about 4 minutes until the mixture is pale and fluffy. You aren’t just mixing; you are aerating the fat, which provides a slight lift to these dense, heavy cookies.
Add the eggs one at a time, followed by a high-quality vanilla extract. Ensure each egg is fully incorporated before adding the next to maintain the emulsion of the dough. This is the stage where the structural integrity of your Oreo stuffed chocolate chip cookies is born.
Phase 2: Incorporating the Dry Elements
Sift together the all-purpose flour, cake flour, cornstarch, baking soda, and a pinch of fine sea salt. Turn your mixer to the lowest setting and slowly add the dry ingredients. Mix until just a few streaks of flour remain—overmixing at this stage will develop too much gluten and ruin the tender texture.
Fold in the chopped dark chocolate by hand. Using a spatula ensures you don’t break the chocolate into dust, keeping those “melted pools” intact during the bake. If you enjoy the process of dough manipulation, you might also find making cookie dough twists a fun secondary project for leftover scraps.
Phase 3: The Oreo Encasement Technique
This is the most critical step for achieving the visual goal. Scoop approximately 60g (about 1/4 cup) of dough and flatten it into a disc in your palm. Place a whole double-stuffed Oreo in the center. Scoop another 40g of dough and place it on top of the Oreo.
Gently seal the edges, ensuring no part of the Oreo is visible. The final dough ball should be roughly the size of a baseball. Do not smooth the surface too much; those cracks and bumps are what turn into the “deeply textured, cracked crust” once baked. If you love the concept of stuffing treats, you should also check out our guide on stuffed cookie hearts for Valentine’s Day.
Phase 4: The Crucial Chill and Bake
Place your giant dough balls on a tray and refrigerate for at least 40 minutes. This is non-negotiable. Chilling solidifies the fat, which is the only way to keep these cookies from spreading into one giant mess. Preheat your oven to 375°F (190°C).
Arrange the chilled balls on the parchment-lined sheet, leaving at least 3 inches of space between them. Bake for 13-15 minutes. The edges should be a deep golden brown, but the centers should still look slightly underbaked and soft. This temperature differential is what creates the contrast between the crispy crust and the melting Oreo cream.
Expert Tips for Bakery-Quality Results
- The “Soothe” Method: If your cookies come out of the oven looking slightly misshapen, immediately place a large circular glass or bowl over the hot cookie and gently scoot it in a circular motion. This rounds out the edges for a perfect circle.
- Salt Timing: Apply the flaky sea salt the second the cookies come out of the oven. The residual heat helps the flakes adhere to the melting chocolate pools.
- Chocolate Selection: Use a bar with at least 60% cocoa solids. The bitterness of dark chocolate is the perfect foil for the sweet Oreo filling.
- Don’t Overbake: These cookies will continue to cook on the hot baking sheet for 5-10 minutes after removal. Pulling them early is the secret to that “soft white cream filling” visual.
Storage, Reheating, and the Art of the Leftover
These cookies are at their absolute peak about 15 minutes after baking, once the structure has set but the chocolate is still fluid. To store, keep them in an airtight container at room temperature for up to 3 days. If you find yourself with too many sweets, you can always balance the palate with a fresh cucumber salad the next day.
To recreate that “fresh from the oven” experience, microwave a single cookie for 10-15 seconds. This will re-melt the dark chocolate and soften the Oreo cream. For long-term storage, these cookies freeze beautifully. Wrap them individually in plastic wrap and freeze for up to 2 months. Thaw at room temperature and warm in a 300°F (150°C) oven for 5 minutes.
What to Serve with Giant Stuffed Cookies
Since these Oreo stuffed chocolate chip cookies are incredibly rich and decadent, they pair best with beverages or sides that offer a bit of acidity or neutral refreshment. A tall glass of ice-cold whole milk is the classic choice, but a bitter espresso or a dark roast coffee also works beautifully to cut through the sugar.
If you are serving these as part of a larger dessert spread, consider including something fruit-forward like zucchini bread or even a light chocolate mochi for a variety of textures. For those hosting a full dinner, these cookies serve as the perfect heavy hitter after a lighter meal of Korean beef bowls or stuffed avocados.
Frequently Asked Questions
You can, but chopped high-quality chocolate bars or feves create larger, more fluid ‘pools’ of chocolate. Standard chips contain stabilizers that help them hold their shape, which prevents that glistening, molten look.
The high baking temperature and the protective layer of dough prevent the Oreo from absorbing too much moisture. Using double-stuffed Oreos also ensures the cream center stays prominent and soft.
Yes. Chilling the dough balls solidifies the fat, which is the only way to maintain the giant, thick structure. If you bake them immediately, the cookies will spread thin and the Oreo may peek through the top.
Microwave a single cookie for 10-15 seconds. This is just enough time to soften the Oreo’s cream filling and re-melt the dark chocolate pools without overcooking the dough.
Using cold, cubed butter instead of room-temperature butter slows down the melting process in the oven. This is essential for creating a thick, high-domed cookie that doesn’t spread too much while encasing the Oreo.
The Master Recipe: Giant Oreo Stuffed Chocolate Chip Cookies
Oreo Stuffed Chocolate Chip Cookies: The Ultimate Bakery-Style Guide to Giant Gooey Perfection
Ingredients
Equipment
Method
- Cream cold cubed butter with brown and granulated sugars for 4 minutes until light and fluffy.
- Add eggs one at a time, mixing well between each addition, then stir in vanilla extract.
- Fold in the sifted flours, cornstarch, and baking soda until just combined. Hand-fold the dark chocolate chunks.
- Flatten 60g of dough, place a whole Oreo in the center, and cover with 40g more dough. Seal the edges completely.
- Chill the dough balls in the refrigerator for 40 minutes to prevent spreading.
- Bake at 375°F (190°C) for 13-15 minutes until edges are golden brown. Top with sea salt immediately.
Notes
Do not omit the cake flour, as it provides the soft, bakery-style crumb.
Join the Honest Food Craving Community
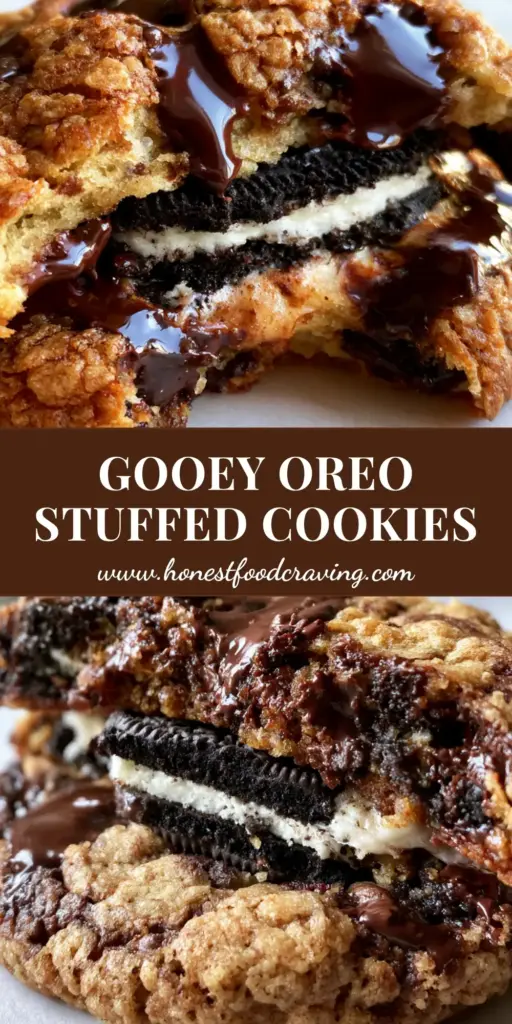
Creating these Oreo stuffed chocolate chip cookies is an exercise in indulgence and culinary fun. We hope this recipe brings a bit of bakery magic into your home kitchen! If you enjoyed this process, we would love to hear from you. Leave a comment below with your results or share your cookie “pull” photos on social media.
For more decadent dessert inspiration and professional baking tips, be sure to follow us on Pinterest and sign up for our newsletter. Don’t forget to pin this recipe to your favorite baking board so you can find it the next time a chocolate craving hits!