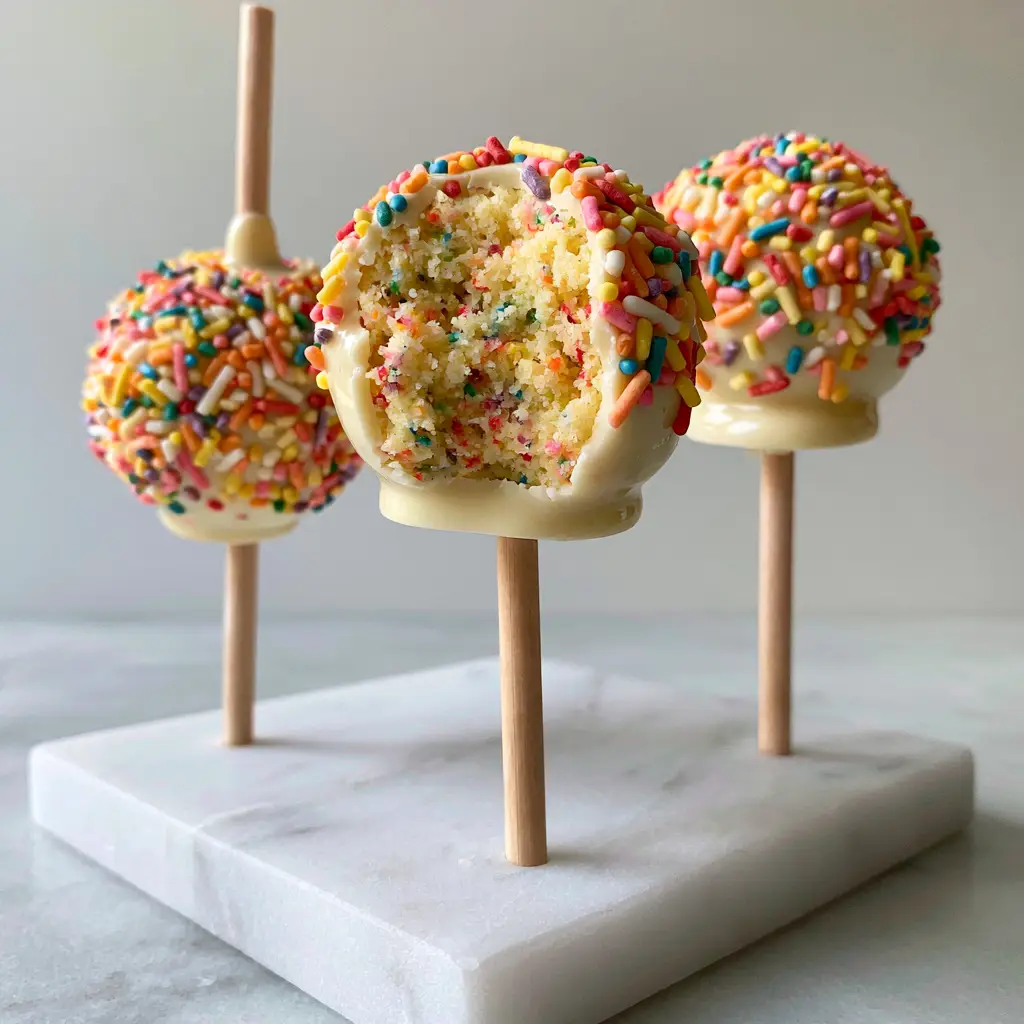
There is something undeniably nostalgic and joyous about funfetti cake pops. They are the ultimate handheld celebration, combining the buttery richness of a classic yellow cake with the playful crunch of rainbow jimmies. Whether you are hosting a birthday party or just looking for a gourmet treat that looks as good as it tastes, these cake pops are the answer.
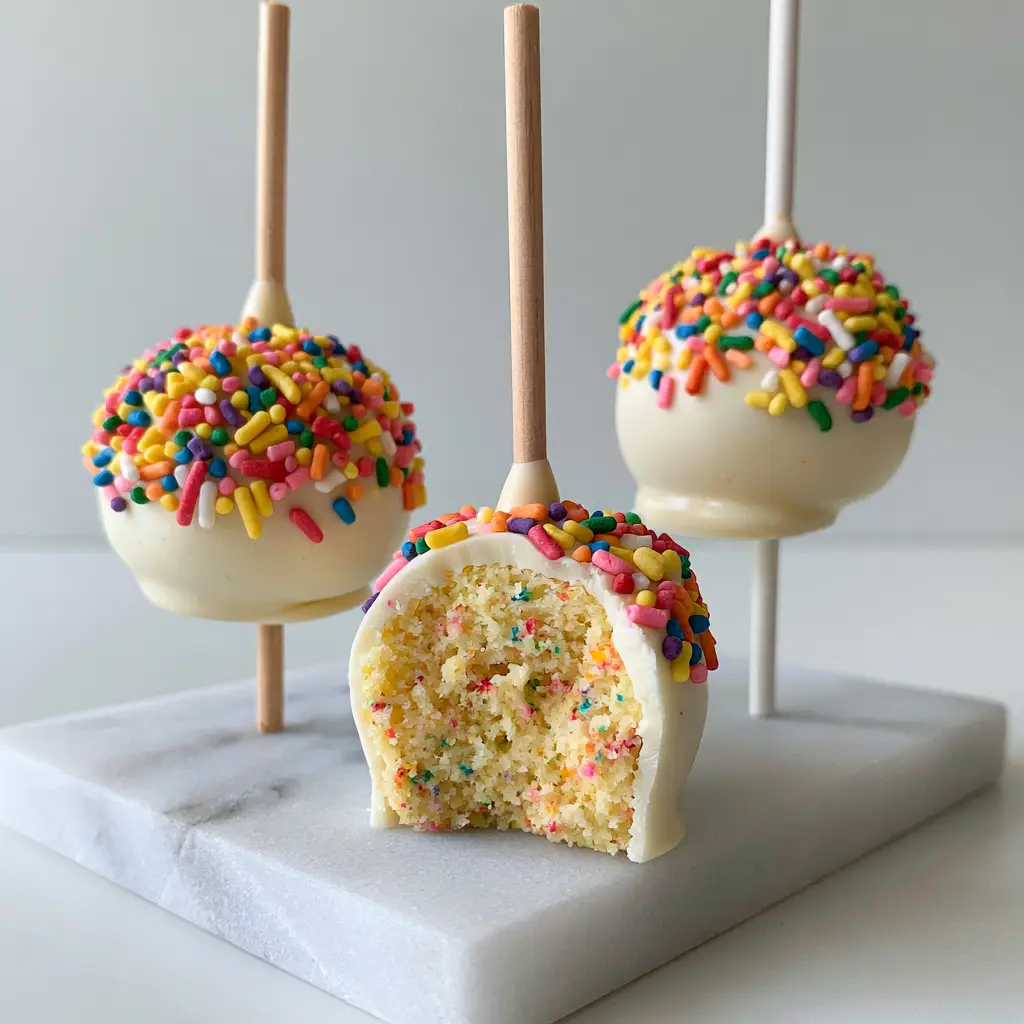
Imagine biting through a thick, snappy, glossy white chocolate shell to reveal a dense, moist, and sprinkle-flecked interior. The contrast between the smooth outer coating and the soft, colorful cake crumb is a sensory experience that keeps you coming back for more. In this guide, we will walk through the forensic culinary steps to ensure your cake pops look exactly like the professional versions seen on a minimalist marble slab.
This recipe focuses on building flavor from the ground up, starting with a scratch-made yellow cake rather than a boxed mix. By controlling the moisture levels and the quality of the white chocolate, you will achieve a gourmet result that rivals any high-end bakery. Let’s dive into the science of the perfect pop.
Why These Gourmet Funfetti Cake Pops Work
- Perfect Structural Integrity: Using a specific ratio of cake crumb to frosting ensures the pops stay firmly on their lollipop sticks without sliding.
- High-Gloss Finish: We use a specific thinning technique for the white chocolate glaze to achieve that smooth, smartphone-photo-ready shine.
- Scratch-Made Moistness: Unlike dry, crumbly versions, our yellow cake base uses buttermilk for a tender, moist interior that stays fresh for days.
- Visual Contrast: The vibrant rainbow jimmies pop against the pristine white background, making these the perfect subject for your next social media post.
The Anatomy of a Perfect Funfetti Cake Pop: Essential Ingredients
To achieve the visual and textural goals of our blueprint, every ingredient serves a specific culinary purpose. We aren’t just making cake; we are engineering a dessert that holds its shape and delivers a flavor punch.
All-Purpose Flour: 1.5 cups (190g). This provides the essential structure. Using all-purpose flour instead of cake flour gives the crumb enough strength to be rolled into tight, dense balls without falling apart.
Unsalted Butter: 1/2 cup (113g), softened. Butter is the soul of a yellow cake, providing that rich, golden flavor and a melt-in-your-mouth texture that oil-based cakes simply cannot match.
Granulated Sugar: 1 cup (200g). Sugar does more than sweeten; it aids in browning and helps retain moisture within the cake crumb after it is baked and crumbled.
Large Eggs: 2 units. These act as the primary binder and leavener, contributing to the yellow hue of the interior cake crumb seen in the visual blueprint.
Buttermilk: 1/2 cup (120ml). The acidity in buttermilk tenderizes the gluten, ensuring the interior of the funfetti cake pops remains moist even after being compressed into spheres.
Rainbow Jimmies: 1/2 cup (80g) plus extra for topping. These are the “fun” in funfetti. Using high-quality jimmies ensures the colors don’t bleed into the yellow cake during the baking process.
White Chocolate Wafers: 16 oz (450g). For a truly smooth, thick glaze, high-quality melting wafers or chopped cocoa butter-rich white chocolate are superior to standard chocolate chips.
Coconut Oil or Paramount Crystals: 1 tbsp (15g). This is the secret to that “glossy, smooth” finish described in the prompt. It thins the chocolate just enough to create an even coating that snaps when bitten.
Professional Equipment for Minimalist Results
To recreate the gourmet look of three pops standing upright on marble, you need a few specific tools. You wouldn’t try to build a decadent chocolate oreo cake without the right pans, and the same logic applies here.
You will need a standard 9×9 inch (23x23cm) baking pan to cook the yellow cake base. A stand mixer or hand mixer is essential for creaming the butter and sugar to incorporate air. For the assembly, ensure you have 6-inch (15cm) lollipop sticks and a cake pop stand (or a block of styrofoam) to allow the glaze to set without flat spots.
Step-by-Step Blueprint for Funfetti Success
Baking the Golden Yellow Foundation
Preheat your oven to 350°F (175°C). Cream the softened butter and sugar together until the mixture is pale and fluffy—this should take about 3-4 minutes. Add the eggs one at a time, followed by the vanilla extract, ensuring each is fully incorporated before adding the next.
Whisk together your dry ingredients (flour, baking powder, and salt). Alternate adding the dry ingredients and the buttermilk to the butter mixture, starting and ending with the flour. Finally, gently fold in the rainbow jimmies. Bake for 25-30 minutes or until a toothpick comes out clean. The cake should be golden on top and fragrant.
The Art of the Gourmet Crumb
Once the cake has cooled completely, remove any browned outer edges if you want a purely yellow interior. Crumble the cake into fine, even pieces in a large bowl. Add 2-3 tablespoons (30-45g) of vanilla buttercream frosting. The goal is a texture like wet sand; it should hold together when squeezed but not be greasy or mushy.
Roll the mixture into 1.5-inch (4cm) balls, ensuring they are perfectly smooth with no cracks. Place them on a parchment-lined tray and chill in the freezer for 15 minutes. This “flash chill” is vital for structural integrity during the dipping phase.
Dipping for the Signature Glossy Shell
Melt your white chocolate wafers with the coconut oil in a deep microwave-safe bowl. Stir every 30 seconds until the mixture is completely liquid and glossy. Dip the tip of a lollipop stick into the chocolate, then insert it halfway into a chilled cake ball. This acts as “glue.”
Submerge the entire ball into the chocolate in one fluid motion. Lift it out, and gently tap your wrist to let the excess chocolate drip off. While the glaze is still wet, generously shower the pop with rainbow jimmies. The side-light in the visual prompt highlights the texture of these sprinkles, so don’t be shy!
Expert Tips for Bakery-Quality Results
- Temperature Control: Never dip a frozen cake ball into hot chocolate. The extreme temperature difference will cause the white chocolate shell to crack as it cools. Aim for room temperature chocolate and “cool” (not frozen) cake balls.
- The Tap Technique: When removing excess chocolate, tap your wrist, not the stick itself. Tapping the stick too hard can vibrate the cake ball right off into the bowl of chocolate.
- Consistency Check: If your chocolate is too thick, add another teaspoon of coconut oil. It should flow like warm honey to achieve that “thick, glossy” look from the blueprint.
- Avoid Over-Mixing: When combining the crumbs and frosting, add the frosting gradually. You can always add more, but you can’t fix a cake ball that has become a paste.
Storage, Freshness, and Make-Ahead Advice
These funfetti cake pops are incredibly stable. You can store them in an airtight container at room temperature for up to 3 days, or in the refrigerator for up to a week. If refrigerating, note that condensation may form on the glossy shell when brought back to room temperature.
For long-term storage, these freeze beautifully. Wrap each pop individually in plastic wrap and store them in a freezer bag for up to 2 months. Thaw them in the refrigerator overnight before serving. This makes them just as convenient as having banana pudding cinnamon rolls ready for a weekend brunch.
What to Serve with Your Gourmet Treats
Since these cake pops are quite sweet and rich, they pair beautifully with light, savory options if you are hosting a full spread. Consider serving them alongside a refreshing cucumber and tomato salad to cleanse the palate.
If you are planning a dessert-only event, they look stunning next to mango strawberry sunset cupcakes for a vibrant, fruit-forward contrast. For a truly gourmet experience, serve them with a cup of cold brew or a tart crunchy tanghulu fruit platter.
Frequently Asked Questions
Yes, but scratch-made yellow cake provides a denser, more flavorful crumb that holds up better during the rolling and dipping process.
Jimmies are preferred for the interior as their colors are less likely to bleed into the yellow cake. Nonpareils work great for the exterior decoration.
Cracking is caused by extreme temperature changes. Ensure your cake balls are chilled but not frozen, and your melted chocolate is not too hot when dipping.
This usually happens if the cake ball is too heavy, the frosting-to-crumb ratio is off, or the stick wasn’t ‘glued’ with melted chocolate before being inserted.
White chocolate can seize if it gets too hot or comes into contact with water. Melt it slowly and add coconut oil to achieve a smooth, glossy consistency.
The Ultimate Funfetti Cake Pop Recipe
Funfetti Cake Pops: The Best Moist Yellow Cake Recipe
Ingredients
Equipment
Method
- Cream butter and sugar until fluffy. Add eggs and vanilla. Mix in dry ingredients alternating with buttermilk.
- Fold in jimmies and bake at 350°F (175°C) for 25-30 minutes. Cool completely.
- Crumble the cooled cake into a fine meal. Mix with buttercream until it holds shape.
- Roll into 1.5-inch spheres. Chill in the freezer for 15 minutes.
- Melt white chocolate with coconut oil until smooth and glossy.
- Insert sticks into balls using melted chocolate as glue. Dip the entire ball into the coating, tap off excess, and top with rainbow jimmies.
Notes
Use high-quality rainbow jimmies to prevent color bleeding into the cake.
Bring the Bakery Home
Mastering funfetti cake pops is a rite of passage for any home baker. By following this forensic blueprint, you’ve moved beyond a simple snack into the realm of gourmet confectionery. The moist yellow cake crumb and the snappy white chocolate coating are a match made in heaven.
Did your pops come out with that perfect glossy shine? We want to see your creations! Leave a comment below or share your photos on social media. For more visual inspiration and decadent recipes, be sure to follow us on Pinterest and join our community of enthusiastic home cooks.